オートクロスエディタ
オートクロスとは
Live for Speedにおけるオートクロスとは、ジムカーナ競技の一つです。
スピンターンなど、激しい動きをするのがジムカーナのイメージとして一般的ですが、英国発祥のオートクロスでは基本的に、舗装された平らな路面でのみ行われ、動きは比較的マイルドなものとされています。
LFSでは、オートクロスのコースをドライブすることができ、またそのコースを作るためのコースエディタ機能を持っています。
オートクロスエディタ操作マニュアル
注意 : オートクロスエディタを使うには、Live for Speedがアンロックされている必要があります。
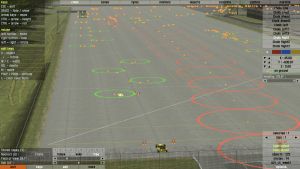
ゲーム中にSHIFT+Uを押すことで、オートクロスエディタにアクセスすることができます。レイアウトのセーブやロード、編集ができます。
注意: もしオートクロスエディタが見えないようであれば、SPACEキーを押してeditをクリックしてください。
全てのエディタのキーは画面上に表示されます。オートクロスシステムはマルチプレイでも機能します。ホストの管理者はゲストが接続中にも、レイアウトをロードしたり編集することができます。
オートクロスレイアウトを作成するにあたって、オブジェクトはもちろん、チェックポイントとスタートポイントを設置して下さい。スタートポイントが設置されていない場合、デフォルトのスタートグリッドが使用され、普通のレーストラックと同じように扱われます。また、その際にはタイムペナルティはなくなりますが、チェックポイントを設置しないと、ラップタイムを計測することができなくなります。
オブジェクトを設置する
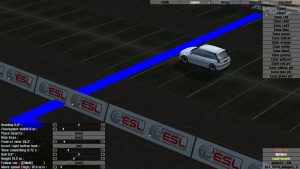
オブジェクトの種類を選択し、「Oキー」を押すことで、オブジェクトを設置することができます。また「<」と「>」キーでオブジェクトの向きを変更できます。何も選択されていない状態で「Mキー」を押すと、そのオブジェクトをマウスカーソルの位置へ移動し、設定した向きへ更新します。
シフトキーを押したまま、「Oキー」や「Mキー」を押すと、1メートルグリッドでオブジェクトを設置/移動します。
画面右では、オブジェクトのプロパティを調整することができます。X/Y/Zの値を調整することでオブジェクトを移動できます。Z値を変更すると、選択したオブジェクトは"浮いている"オブジェクトへと変わります。これは水色のオブジェクトアイコンで表示されます。 1800の物理オブジェクトと120の制限区域とルートコントロールを設置することができます。Objects range from red and white solid barriers, concrete ramps and advertisement banners to movable straw bales, cones and keep left/right signs, as well as many other items.
いくつかのオブジェクトは、幅や長さ、高さやピッチ、角度などを調整するプロパティを持っています。
チェックポイントを設置する
You need one finish line and at least one checkpoint. In effect this defines the circuit, and also gives you split times at those points. Pressing F or 1, 2, 3 gives you a finish line or a checkpoint. You can adjust their direction and width in the same way as you do for objects, by pressing the M key. Checkpoints are invisible when driving - it is up to the person who edits the track to make sure the user drives through them, by using cones or other objects. The W and E keys can be used to set the width of a checkpoint.
NOTE : direction is important with checkpoints. You must drive over a checkpoint in the correct direction or no time will be recorded.
A checkpoint looks like a square bracket, and you must drive FROM the side with the "ends" of the square bracket and over TO the "flat side" of the square bracket.
制限区域とルートコントロール
In "marshall" mode you can place Marshall areas and Route checkers.
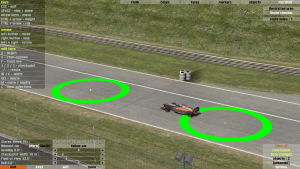
Marshall areas are shown by a red circle. If a car enters one of them in single player, it will receive a 45 second penalty. In multiplayer mode, the player will be forced to spectate.
Route checkers are shown by a green circle. Each route checker has a route index number which is shown near the top right of the screen when a route checker is selected. Cars must pass through these route checkers in the correct order, or they will receive a penalty or be forced to spectate. The route index is automatically generated in the order the route checkers are created. You can manually edit the route index by clicking on the route index button.[1]
レースコントロールオブジェクト
There is a dedicated category of objects called "control", which allows you to alter the race grid or otherwise control the race.
The starting grid can be modified by placing up to 40 custom start positions. If you want the car garages/pits to be elsewhere, add new custom pit start points or pit stop boxes.
You can also place custom start lights if your layout doesn't use the start lights on the official configurations.
マーカー
0.6Bから、マーカーカテゴリが追加されました。このカテゴリには、ドライバーにコーナー指示するマーカーや、コーナーまでの距離(25-250m)を示す標識など、さまざまな種類のマーカーがあります。
操作方法
視点操作 - マウスとキーボード: 画面上にリスト表示されています。また、Views#Free-floating_cameraと同様に操作できます。
SPACEキー を押すことで、エディタのボタンの表示/非表示が切り替えられます。
距離計測機能 : Dキー を押すことで計測ツールを起動します。
CTRLキー とクリックを同時に行うことで、複数のオブジェクトを同時に選択することができます。選択したオブジェクトは一度に動かしたり、回転させたりコピーしたりすることができます。
SHIFT + OまたはMキー で1mグリッドでオブジェクトを設置したり移動したりすることができます。
|
基本セットアップガイド | 応用セットアップガイド | テクニカルリファレンス | スキン作成 チュートリアル | オートクロスエディタ | ムービー作成 チュートリアル | スクリプト作成 | Host チュートリアル | LFS プログラミング | ファイルフォーマット | |||


